Temple and Family History Lesson 4: The Person Page
Temple and Family
History
Lesson 4
The Person Page
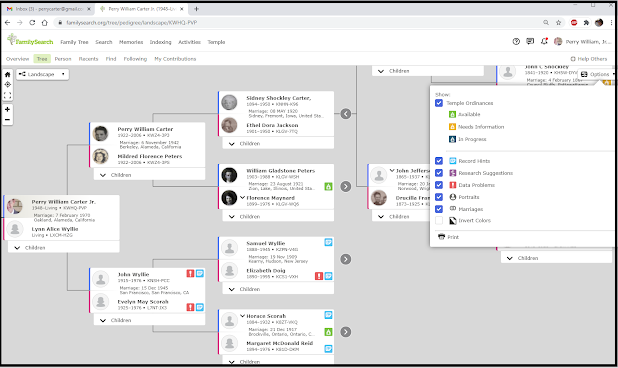
In lesson 3 we learned how to look at the several views of
the Family Tree, or Pedigree Chart available in Family Search; the Landscape,
Portrait, Fan Chart, and Descendancy views.
We saw that each view has information associated with it that can help
us in directing our research and guiding our Temple Name Submission efforts.
In this lesson we will look at the page that contains the
most information pertaining to an ancestor, the Person Page. We will discuss the ‘Details’ screen giving
vital information for the person, and the ‘Ordinances’ screen where temple
ordinances can be requested.
In all of the views discussed in Lesson 3 names of ancestors
are displayed in one form or another. In
any of these presentations, if you click (left mouse click) on a name the same
dialog box will open. This dialog box is
shown in Figure 1 for a name presented and clicked on in the Descendancy tree.

In this example I have clicked on the name of Florence
Maynard, my maternal grandmother, but clicking on any of the names on this
Descendance view would have opened a similar box. I call the box in the red oval the Person
Detail Box. This box will open whenever
you click on a name appearing in any of the four Family Tree views or in almost
any other screen within the Family Search program.
This box contains a summary of individual information,
usually enough to judge if this is a person you wish to work on. The name, birth and death information, and
temple ordinance status are all shown. The temple ordinance information is color
coded for immediate identification by the colors of the tiles shown in a
horizontal row at the bottom of the box.
By hovering the mouse curser over any of the tiles a more complete
information line will appear showing the date and the temple where the
ordinance was performed, or in the case of non-completed ordinances, the status
of the person’s ordinance-critical information.
This is a quick way to discover the detailed ordinance status of any
name on the tree.
If this looks like the person you want to know more about,
this ‘Person Detail Box’ can lead you to the more information-filled page, the
Person Page.
The Person Page
By clicking on either the person’s name at the top of the
box or the word “Person” at the bottom, darkened border of the box, Family
Search will take you to the Person Page.
This page, for my grandmother, is shown in Figure 2.

Notice that this page does not all fit on one computer
screen. You will have to scroll down
quite a ways to get to the bottom of the page.
We will start at the top.
The first thing to note is the full name, birth and death
information, and Family-Search Identification Number (ID Number) as indicated
in the upper red oval in Figure 2. This
information is the source for the same information given in the Person Detail
Box of Figure 1, but without the birth and death places. The ID Number is a very important item of
information as it allows the unique identification of this person from all
other persons of the same or similar name in the Family Search database. You will often want to save this number with
pencil and paper or on a clipboard of your computer (Highlight the number with
the curser then click on Control-c, holding down the Control key while pressing
the ‘c’ key). It will be important to
future discussions regarding identifying duplications in the database.
Next comes the horizontal menu of options available from
this starting screen. Notice that the
word ‘Details’, on the far left of the lower red oval, is highlighted in green
in this example. This is the option that
shows details of life events for this person and is the best place to begin a
discussion of the Person Page. Most of
our research into the life of this person is undertaken to provide the details
of these life events.
To continue on this Person Page you will have to begin to
scroll down the page. This can be done
by putting the mouse curser anywhere on the page and rolling the mouse roller
if you have one. If you do not have a
roller you can place the curser on any spot on the page that is not a link to some
other page (links to other pages are usually indicated by a small pointing
finger in place of the curser arrow) and while holding down the left mouse
button dragging the page up or down.
This is called “Click and Drag”.
Scrolling down the page, which is actually moving the page
up on the computer screen, you come to the section identified by the word
“Vitals” in the upper left corner of the section. Next to the word “Vitals” is a small, solid
black arrow that can be selected to hide the information (arrow points to the
right) or reveal the information (arrow points down). The default position for the arrow is down
with the detailed vital information showing, including name, sex, birth date
and place, christening or baptism date and place, and death and burial dates
and places. Note that marriage
information is not given in this section but is given further down.
Scrolling further down you come to the section called “Other
Information”. Included here are any
other details of the person’s life such as places they have lived, other names
they went by, offices they may have held, etc.
The next section down is called “Family Members”. Here are found the names of the person’s parents
and siblings (on the right), the person’s spouses, and children of each spouse
(on the left). Note that each name in
this section includes birth and death years and the person’s ID Number. There is no other page in Family Search that
gives this much information about a person.
Figure 3 shows this section of the Person Page for my
grandmother Maynard. I will call attention
to the circled links with the words “Add Spouse”, “Add Child”, and “Add Parent”
indicated in this screen.

These links are used to add these several persons if they
are missing. We will look at this
process in the next lesson.
Scroll back now to the top of the page and look at the
horizontal menu that is shown circled with the long oval in Figure 2. So far we have only looked at the selection ‘Details’
from this menu. We will look at other
selections in later lessons, but for now, left click on the selection at the far right, ‘Ordinances”.
Ordinances
The principle objective of the Church in creating and
maintaining “Family Search” is to facilitate and record the performance
of sacred Temple ordinances for us and our ancestors. The page that opens when you click on ‘Ordinances’
is the documentation of all that ordinance work, its current status and the
details of its completion. The ordinance
status is first indicated by the colored tiles in the left-hand column under
Ordinance, as shown in Figure 4. The
legend identifying the meanings of the several colors has changed from time to
time, but the current meanings of at least the most common colors can be found
by clicking on the word ‘LEGEND’ at the
upper right-hand corner of the page, also indicated by a red circle in Figure
4.

As you can see in Figure 4 all of the ordinances for my
grandmother have been completed (gray tiles).
Notice that the details of date and temple are shown for each ordinance,
as well as the names of parents and spouse (s) that the person has been sealed to.
We are most interested, of course, in seeing the light-green
tiles next to an ordinance, indicating that that ordinance can be requested for
submission to the temple. Where there is
an ordinance that can be requested (light-green tile) there will also appear a blue
box with the word ‘Request’ at the top of the ‘Ordinance’ column. Clicking on that blue box will initiate the
sequence of screens that are followed to clear that ordinance for submission to
a temple.
These screens include written instructions for how to
proceed through this process, starting with the question regarding persons born
within the last 110 years, asking if you have written permission from the
closest living relative before proceeding further. Without that permission this person will just
have to wait for their temple ordinances until the 110-year period has elapsed. In some cases this can be a discouraging end to
your research regarding this person, but never fear, you can still add many
memories for him or her, which we will consider in a later lesson. Also, there are still at least a million other
relatives born earlier than 110 years ago that you can seek after!
Requesting an Ordinance
Let’s take a look at the process mentioned above for requesting
an ordinance. Figure 5 is an image of
the ‘Ordinances’ page for my great-great uncle, Michael Jackson (no relation to
the 20th Century singer).

The ordinance of sealing to his parents has not yet been
submitted, as evidenced by the light-green tile circled in Figure 5. This is interesting in itself since all of
his other individual ordinances have been submitted or completed according to
the colored tiles showing in the left-hand column. It is also revealing that his endowment was
cleared and shared with the temple system in 2010, and evidently has not yet
been done!
But his sealing to parents has not yet been requested, so we
will click on the blue ‘Request’ box at the top of the left-hand column.
The next box that opens in this particular example includes
the warning, ‘Possible Duplicates”. This
is a common condition and it freezes any more progress on this request. We will have to go back to the ‘Details’
screen of the ‘Person Page’ and clear up the duplicate name issue before
proceeding. This situation may be part
of the cause for the lengthy delay in completion of the Endowment
ordinance. We will consider the issue of
resolving duplicate names by ‘Merging’ in a later lesson. For now I will look into the problem and see
if I can eliminate the duplicate and then return to the ordinance request.
The ‘Duplicate Name’ problem was easy to solve and now we
are back at the ‘Ordinance’ screen in Figure 5.
When we click on the blue ‘Request’ box we now see a box showing the
available ordinances that can be requested; the Endowment and the Sealing to
Parents as shown in Figure 6. There is
no more mention of a possible duplicate name.

Figure 6. The Second Request Box
The two available ordinances in this instance are linked
together so that one cannot be selected without the other. So we select them both and click on the new ‘Request’
button highlighted in Figure 6.
The next box that opens is a narrative text explaining
Church Policy regarding name submission.
The text describes those individuals for whom we can submit names, and
those for whom we may not. After reading
the policy, click on the ‘Accept’ box at the lower left-hand corner.
The next screen returns to the ‘Ordinances’ page for Michael
Jackson but now the ordinance ‘Sealing to Parents’ shows a dark-green tile, not
light-green. It is now an ordinance ‘In
Process’ rather than ‘Ready’.
Among the options existing in the name-clearing process are
the choices to either print ordinance cards for this person to personally take
to the temple, share the ordinance with some other family member, or share the
ordinance with the temple system. And
you can go back and change your mind about this decision any time before the
ordinance is actually completed.
Figure 7 shows what this screen looks like. Note the ‘Print’ and ‘Share’ links at the top
of the ordinance columns.

At present the ‘Print’ link is disabled, probably because
most temples are in Phase 2 operation.
This link normally opens a ‘Print’ screen which allows you to print the
ordinance card on your home computer. If you walked into a temple with this name and
ID Number, supposedly to participate in a living endowment session, the temple records
office could probably print the card for you. In this case I will click on the ‘Share’ link
and then share the name with the temple.
In this lesson we have introduced the most frequently used
page in Family Search, the ‘Person Page’, and have discussed the information
given in the ‘Details’ screen and in the ‘Ordinances’ screen. We have looked at the process for requesting
an ordinance from the ‘Ordinances’ screen.
There are many possible combinations of circumstances that can accompany
this process; we have looked at a fairly straight-forward case. Each case will be slightly different but the
textual instructions at each point help get you through the process. In our next lesson we will look at adding
names to Family Search using the ‘Person Page’.

Comments
Post a Comment